
做机器人或者小车的同学,早晚都会遇到「想知道它到底多重」这种需求。比如机械臂抓了个物体,想知道是不是抓空了;或者想给自己的小车加装载监测。这类需求的主角就是称重传感器(load cell),而把它接进 ESP32 的标准搭档,是一块叫 HX711 的 24 位 ADC 放大板。这篇带大家从接线、装库一路走到串口里读出稳定的克数,核心难点只有一个:校准系数怎么求。
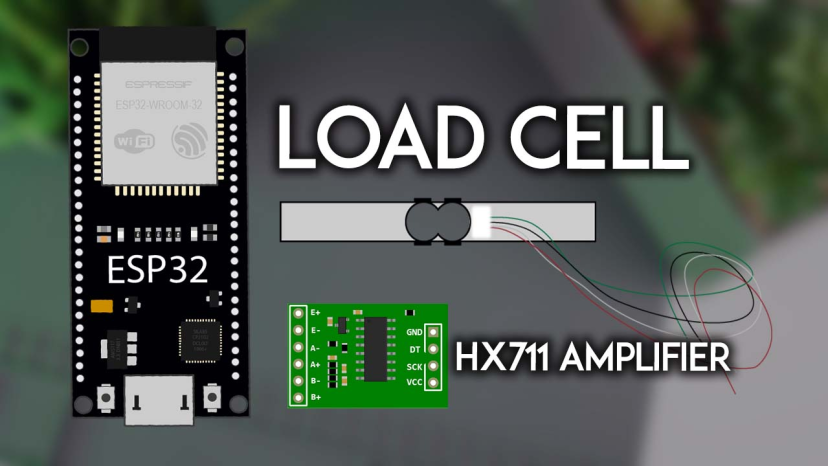
先认识称重传感器和 HX711
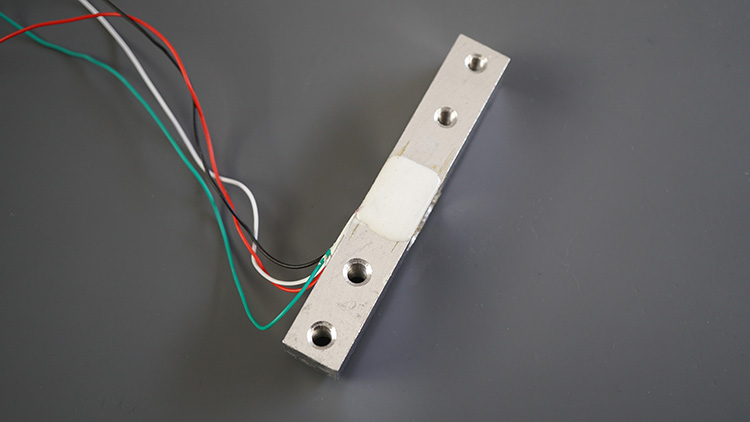
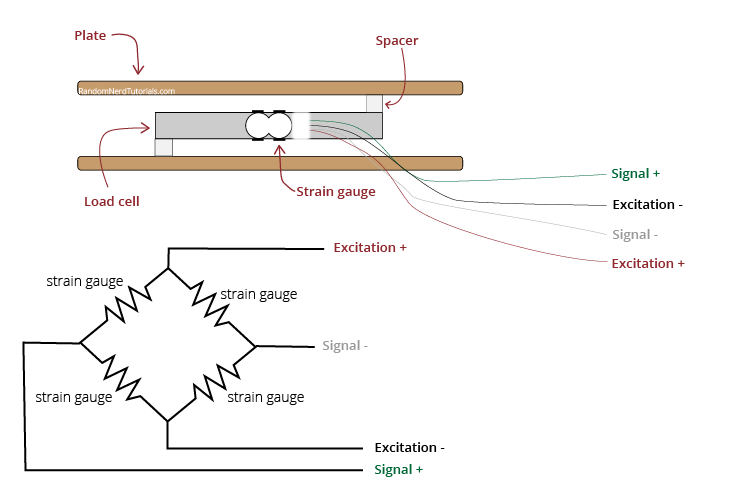
常见的廉称重传感器本质是一根金属梁,上面贴了应变片(strain gauge)。受力变形时应变片阻值微变,但这个变化小到 ADC 根本读不出来,所以工程上把四片应变片接成惠斯通电桥,把微小的阻值差放大成可测的电压差。梁中间有孔,一端装底座(spacer 那头),悬空端装称盘,受力方向必须按箭头标注来,装反了读数要么不变要么飘。
惠斯通电桥的四个桥臂正好对应传感器里的四片应变片,引出四根线:激励正负(E+、E-)给桥供电,信号正负(S+、S-)输出差分电压。
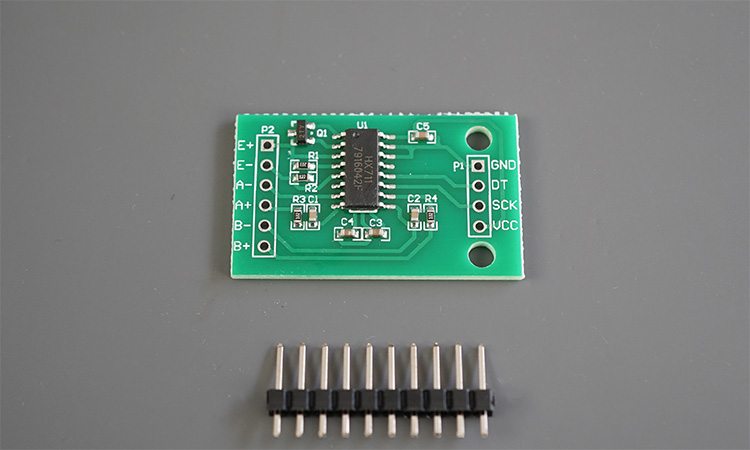
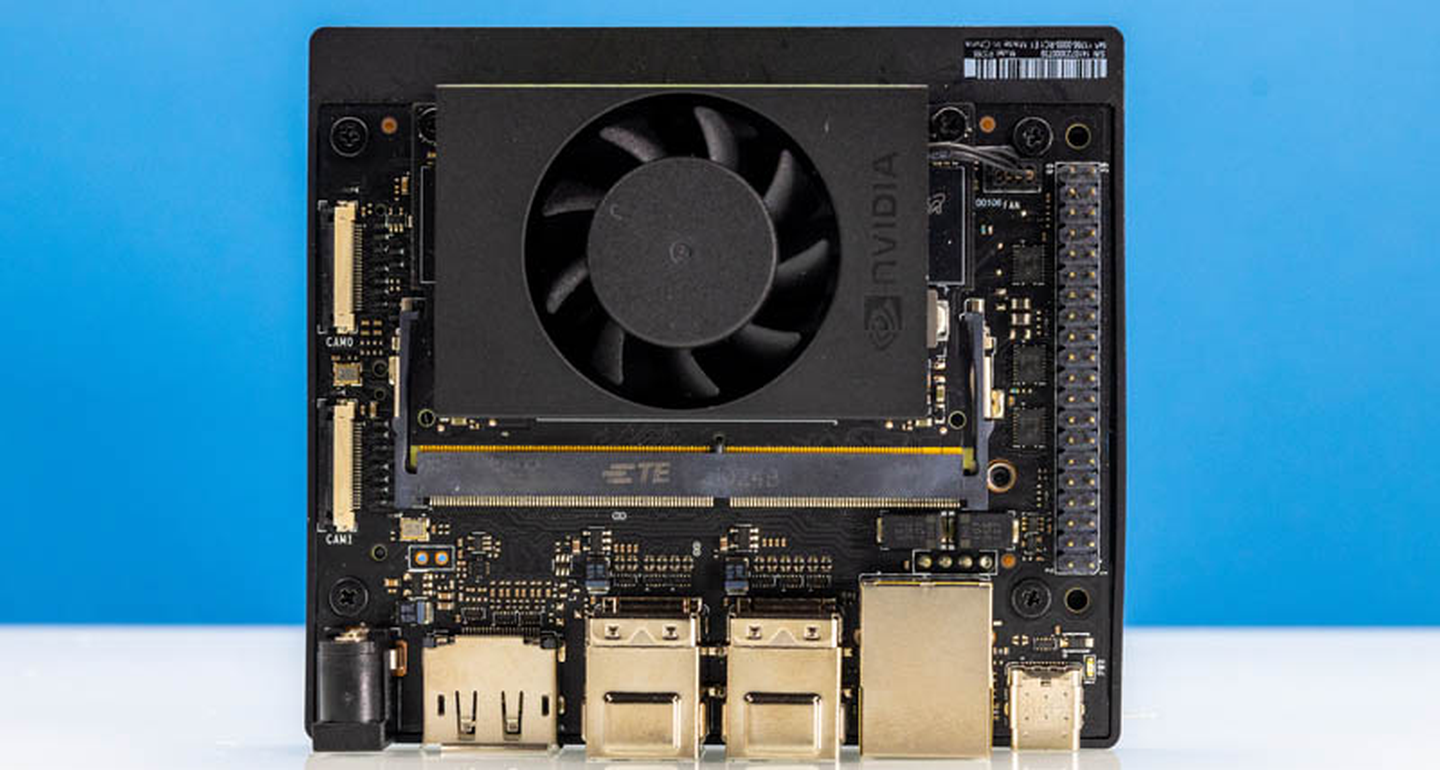
HX711 就是专为这种桥式传感器做的 24 位差分 ADC,内部还带 128 倍(通道 A)可编程增益,把桥输出的毫伏级信号放大再转换。它通过两根线(DOUT、SCK)跟单片机通信,时序自己搞定,不需要 I2C 也不需要 SPI。
接线与装库
接线一共六根:HX711 的 VCC 接 ESP32 的 3.3V,GND 共地,DOUT 接 GPIO16,SCK 接 GPIO4;称重传感器的红、黑、绿、白四根线按 E+、E-、A+、A- 接到 HX711 的端子上。不同厂家线色可能不同,拿到手先量一下:红黑之间阻值通常约等于绿白之间的两倍,这是判断激励端和信号端最靠谱的办法。
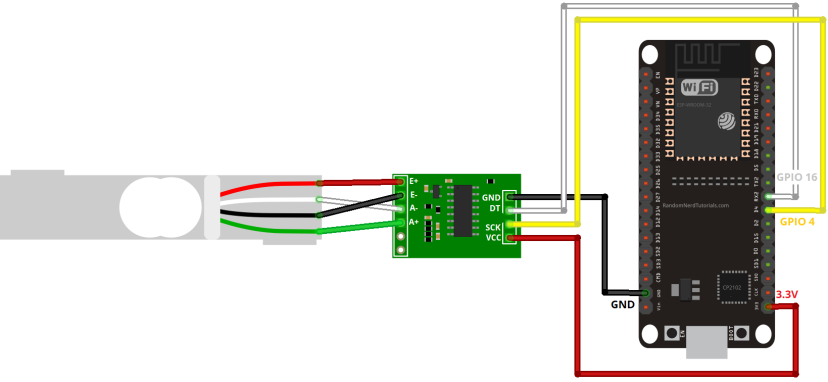
库用的是 bogde 的 HX711 库,Arduino IDE 里「工具 → 管理库」搜 HX711 直接装,PlatformIO 用户用 lib_deps 加 bogde/HX711 即可。顺带说一句,示例代码里有一段把 ESP32 主频降到 80MHz 的操作,因为个别新版库和 240MHz 主频有时序兼容问题,照抄不影响功能。
校准:求出那一个系数
校准的逻辑非常朴素:先去皮,再放一个已知重量的东西上去,记下原始读数,用读数除以已知重量就是校准系数。每个传感器的系数都不一样,必须自己测。下面这段校准草图,上传后打开 115200 波特率的串口监视器,按提示操作即可:
/*
  Rui Santos
  Complete project details at https://RandomNerdTutorials.com/esp32-load-cell-hx711/

  Permission is hereby granted, free of charge, to any person obtaining a copy
  of this software and associated documentation files.

  The above copyright notice and this permission notice shall be included in all
  copies or substantial portions of the Software.
*/

// Calibrating the load cell
#include "Arduino.h"
#include "soc/rtc.h"
#include "HX711.h"

// HX711 circuit wiring
const int LOADCELL_DOUT_PIN = 16;
const int LOADCELL_SCK_PIN = 4;

HX711 scale;

void setup() {
  Serial.begin(115200);
  rtc_cpu_freq_config_t config;
  rtc_clk_cpu_freq_get_config(&config);
  rtc_clk_cpu_freq_to_config(RTC_CPU_FREQ_80M, &config);
  rtc_clk_cpu_freq_set_config_fast(&config);
  scale.begin(LOADCELL_DOUT_PIN, LOADCELL_SCK_PIN);
}

void loop() {

  if (scale.is_ready()) {
    scale.set_scale();
    Serial.println("Tare... remove any weights from the scale.");
    delay(5000);
    scale.tare();
    Serial.println("Tare done...");
    Serial.print("Place a known weight on the scale...");
    delay(5000);
    long reading = scale.get_units(10);
    Serial.print("Result: ");
    Serial.println(reading);
  }
  else {
    Serial.println("HX711 not found.");
  }
  delay(1000);
}

//calibration factor will be the (reading)/(known weight)
运行后串口先提示清空秤盘自动去皮,五秒后放上已知重量的物体,再过五秒输出原始读数。原教程作者用厨房秤称了一杯 300g 的水当砝码,串口输出如下,读数是 -141449:
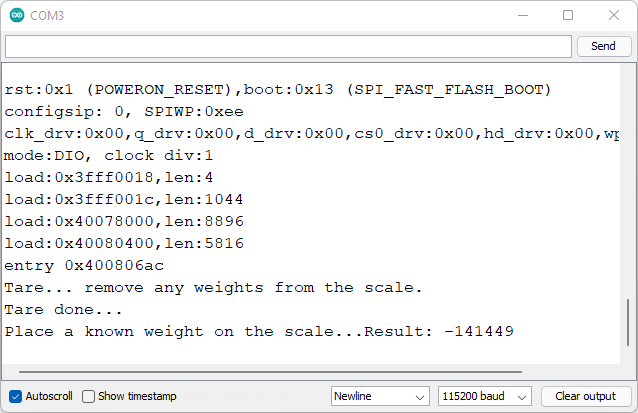
那么校准系数就是 -141449 ÷ 300 ≈ -471.497。负号很正常,取决于受力方向和接线顺序。单位随你定,用克就是克系数,用磅除以磅数即可,比例关系是线性的。系数记下来,换传感器就要重新校,别偷懒。
正式读克数
把系数填进下面草图里 set_scale() 的参数位置,烧录后串口就会持续输出实际克数:
/*
 * Complete project details at https://RandomNerdTutorials.com/esp32-load-cell-hx711/
 *
 * HX711 library for Arduino - example file
 * https://github.com/bogde/HX711
 *
 * MIT License
 * (c) 2018 Bogdan Necula
 *
**/
#include "Arduino.h"
#include "HX711.h"
#include "soc/rtc.h"

// HX711 circuit wiring
const int LOADCELL_DOUT_PIN = 16;
const int LOADCELL_SCK_PIN = 4;

HX711 scale;

void setup() {
  Serial.begin(115200);
  rtc_cpu_freq_config_t config;
  rtc_clk_cpu_freq_get_config(&config);
  rtc_clk_cpu_freq_to_config(RTC_CPU_FREQ_80M, &config);
  rtc_clk_cpu_freq_set_config_fast(&config);
  Serial.println("HX711 Demo");

  Serial.println("Initializing the scale");

  scale.begin(LOADCELL_DOUT_PIN, LOADCELL_SCK_PIN);

  Serial.println("Before setting up the scale:");
  Serial.print("read: \t\t");
  Serial.println(scale.read());      // print a raw reading from the ADC

  Serial.print("read average: \t\t");
  Serial.println(scale.read_average(20));   // print the average of 20 readings from the ADC

  Serial.print("get value: \t\t");
  Serial.println(scale.get_value(5));   // print the average of 5 readings from the ADC minus the tare weight (not set yet)

  Serial.print("get units: \t\t");
  Serial.println(scale.get_units(5), 1);  // print the average of 5 readings from the ADC minus tare weight (not set) divided
            // by the SCALE parameter (not set yet)

  scale.set_scale(-471.497);
  //scale.set_scale();                      // this value is obtained by calibrating the scale with known weights; see the README for details
  scale.tare();               // reset the scale to 0

  Serial.println("After setting up the scale:");

  Serial.print("read: \t\t");
  Serial.println(scale.read());                 // print a raw reading from the ADC

  Serial.print("read average: \t\t");
  Serial.println(scale.read_average(20));       // print the average of 20 readings from the ADC

  Serial.print("get value: \t\t");
  Serial.println(scale.get_value(5));   // print the average of 5 readings from the ADC minus the tare weight, set with tare()

  Serial.print("get units: \t\t");
  Serial.println(scale.get_units(5), 1);        // print the average of 5 readings from the ADC minus tare weight, divided
            // by the SCALE parameter set with set_scale

  Serial.println("Readings:");
}

void loop() {
  Serial.print("one reading:\t");
  Serial.print(scale.get_units(), 1);
  Serial.print("\t| average:\t");
  Serial.println(scale.get_units(10), 5);

  scale.power_down();             // put the ADC in sleep mode
  delay(5000);
  scale.power_up();
}
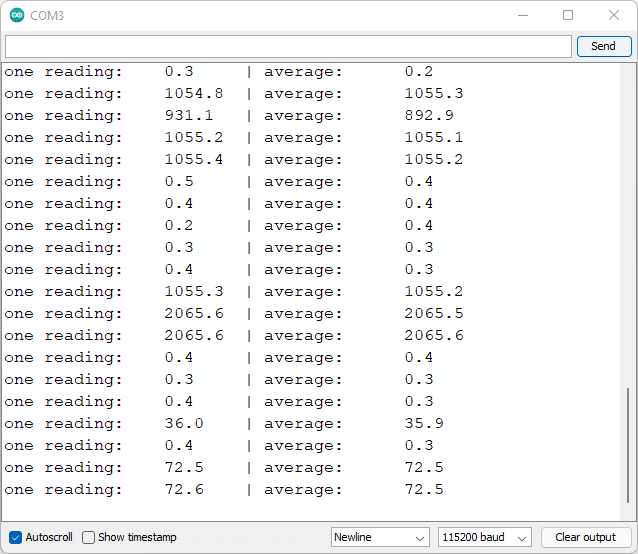
从串口输出能直观看到效果:空盘时读数 0.2 到 0.5g 之间抖动,放上一杯水立刻跳到 1055g 左右,再加一个 1kg 砝码变成 2065g,单次读数和十次平均都在合理范围内。
几个实战注意点
一是结构安装,传感器必须一端固定、悬空端受力,垫片(spacer)那侧朝下装底座,用 M4/M5 螺丝拧紧,装成两端都固定就等于白买。二是去皮,每次上电环境不同,正式使用前先空载调一次 tare(),程序里可以做成按键去皮。三是稳定性,HX711 对电源敏感,和舵机之类的噪音源共用 3.3V 会飘,最好独立供电或加粗滤波电容;get_units(10) 这种多次取平均的写法比单次读数稳得多。四是量程,1kg、5kg、20kg 的传感器外形接近但满量程差很远,超程会永久损伤应变片,选型时留一倍余量。照这套流程走下来,读克数其实就差一个系数的事,动手试试吧。


刚试了,5kg的传感器接上后空盘抖动0.3g左右,加个100uF电容确实稳了不少
问下校准系数是负的没问题吧?我这边测出来-800多,总担心是接反了
杯子的重量用厨房秤先称一下这招实用,我之前一直用手机瞎估重量,结果系数差了十万八千里
分享个翻车:我把传感器两端都拧死在工作台上了,读数永远不变,查了一晚上才发现悬空端必须能受力
求教,这个方案最大能称多重的?看到有1kg和20kg的规格,不知道怎么选