
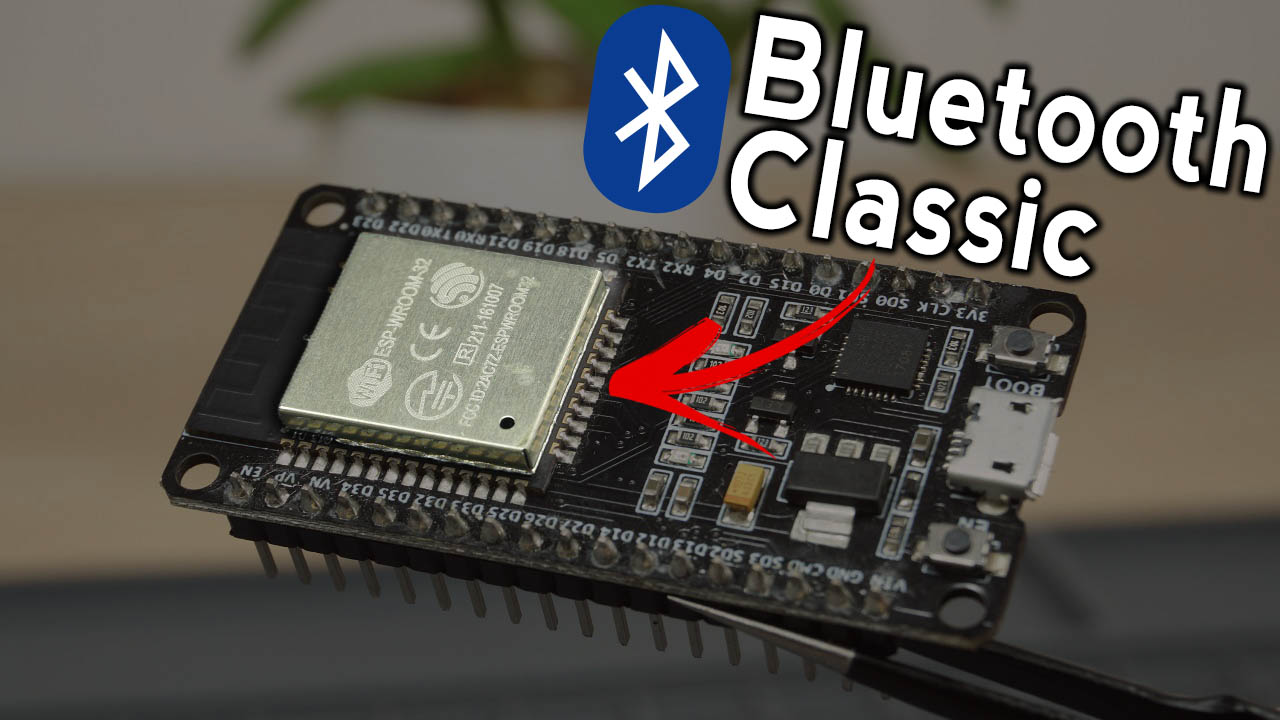
ESP32 这颗芯片最爽的地方就是把 Wi-Fi、BLE 和经典蓝牙全塞进了同一个模组。玩过 Arduino 外挂 HC-06 的人上手经典蓝牙几乎零成本——它走的就是标准串口协议(SPP),SerialBT 用起来跟普通 Serial 一模一样。这篇从官方示例的透传开始,一路做到用手机 App 发指令遥控 LED,再把温度读数回传到手机,全程 Arduino IDE 搞定。
先备齐这几样东西
硬件清单很简单:一块 ESP32 开发板(DOIT DEVKIT V1 这种常见款就行)、一台带蓝牙的 Android 手机、一颗 5mm LED 配 330 欧限流电阻、跳线和面包板。示例进阶部分还用到了 DS18B20 温度传感器加 4.7k 欧上拉电阻,不想玩温度回传可以先跳过。
手机端要装一个蓝牙串口终端 App,Play 商店里搜 Serial Bluetooth Terminal 就有,这也是底稿演示用的那款。提醒一句:这套玩法只兼容 Android,iPhone 上没有开放的 SPP 通道,别在这上面耗时间。
前置条件只有一个:Arduino IDE 里已经装好 ESP32 支持包。没装过的话先去把板子支持包配好,Windows 和 Mac/Linux 的安装步骤官方都有,装完能在板型列表里看到 ESP32 系列再继续。
第一课:Serial 和蓝牙互为透传
打开 Arduino IDE,走 File > Examples > BluetoothSerial > SerialtoSerialBT,加载官方自带示例。代码不长,全貌如下:
//This example code is in the Public Domain (or CC0 licensed, at your option.)
//By Evandro Copercini - 2018
//
//This example creates a bridge between Serial and Classical Bluetooth (SPP)
//and also demonstrate that SerialBT have the same functionalities of a normal Serial

#include "BluetoothSerial.h"

#if !defined(CONFIG_BT_ENABLED) || !defined(CONFIG_BLUEDROID_ENABLED)
#error Bluetooth is not enabled! Please run `make menuconfig` to and enable it
#endif

BluetoothSerial SerialBT;

void setup() {
  Serial.begin(115200);
  SerialBT.begin("ESP32test"); //Bluetooth device name
  Serial.println("The device started, now you can pair it with bluetooth!");
}

void loop() {
  if (Serial.available()) {
    SerialBT.write(Serial.read());
  }
  if (SerialBT.available()) {
    Serial.write(SerialBT.read());
  }
  delay(20);
}
这段代码在两台设备之间架了一条双向蓝牙串口桥。开头先 include BluetoothSerial 库,接着三行条件编译检查蓝牙功能是否启用,没启用直接报错提示你去开配置。
然后创建一个 BluetoothSerial 实例,名字叫 SerialBT。setup() 里串口波特率 115200,SerialBT.begin("ESP32test") 给蓝牙设备起名——默认叫 ESP32test,你可以改成任何想要的名字。loop() 里两个 if 各管一个方向:串口有数据就往蓝牙写,蓝牙有数据就往串口写。SerialBT.write() 走蓝牙发数据,Serial.read() 读串口收到的字节。
手机配对与连接实测
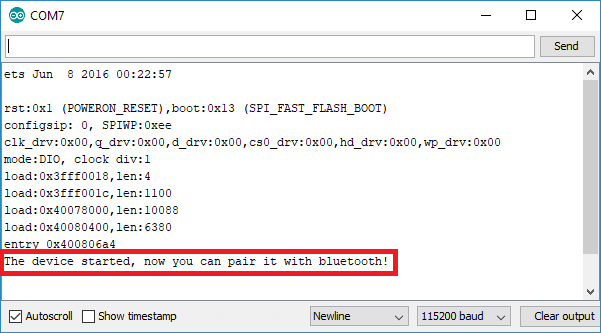
代码烧进 ESP32(注意板型和 COM 口选对),打开 115200 的串口监视器,按一下板子上的 Enable 键。几秒后你会看到提示:The device started, now you can pair it with bluetooth!
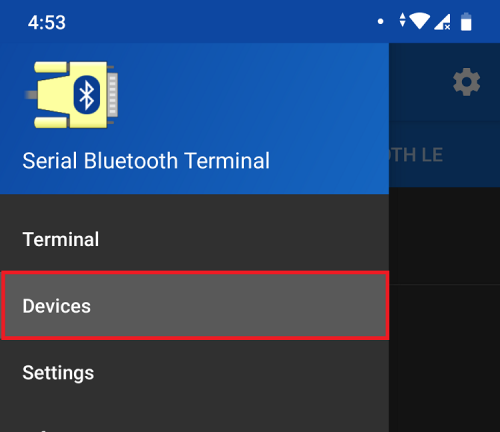
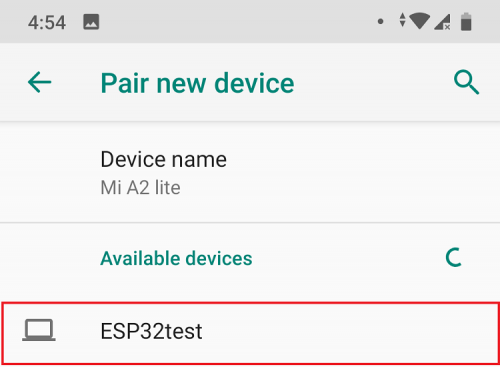
这时掏出手机,打开 Serial Bluetooth Terminal。第一次连接要先配对:进 Devices 页,点设置图标选 Pair new device,列表里会出现 ESP32test,点它完成配对。
配好之后回到 App 主界面,点顶部的连接图标,弹出 Connected 就说明链路通了。
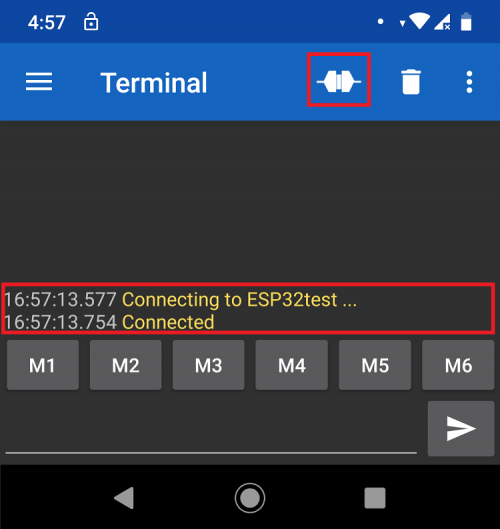
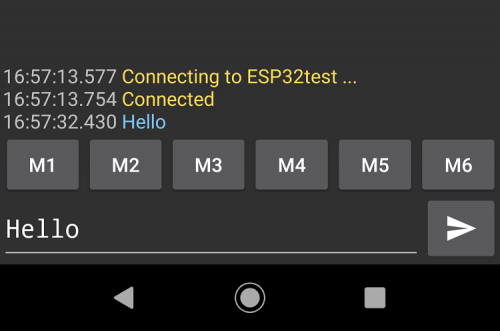
在 App 输入框随便敲个 Hello 发出去,Arduino 串口监视器应该立刻收到同样的字符。反过来也行:在串口监视器顶栏输入内容点 Send,手机 App 马上就能看到。双向链路验证完毕。
实战:蓝牙指令遥控 LED,温度每 10 秒回传
透传玩明白之后,改一改就是实用项目:收到特定消息就控制 ESP32 的输出,同时把传感器读数发回手机。底稿这个项目每 10 秒推一次 DS18B20 温度到手机,收到 led_on / led_off 就点亮或熄灭接在 GPIO25 的 LED。完整代码如下:
/*********
  Rui Santos
  Complete project details at https://randomnerdtutorials.com
*********/

// Load libraries
#include "BluetoothSerial.h"
#include "OneWire.h"
#include "DallasTemperature.h"

// Check if Bluetooth configs are enabled
#if !defined(CONFIG_BT_ENABLED) || !defined(CONFIG_BLUEDROID_ENABLED)
#error Bluetooth is not enabled! Please run `make menuconfig` to and enable it
#endif

// Bluetooth Serial object
BluetoothSerial SerialBT;

// GPIO where LED is connected to
const int ledPin =  25;

// GPIO where the DS18B20 is connected to
const int oneWireBus = 32;
// Setup a oneWire instance to communicate with any OneWire devices
OneWire oneWire(oneWireBus);
// Pass our oneWire reference to Dallas Temperature sensor
DallasTemperature sensors(&oneWire);

// Handle received and sent messages
String message = "";
char incomingChar;
String temperatureString = "";

// Timer: auxiliar variables
unsigned long previousMillis = 0;    // Stores last time temperature was published
const long interval = 10000;         // interval at which to publish sensor readings

void setup() {
  pinMode(ledPin, OUTPUT);
  Serial.begin(115200);
  // Bluetooth device name
  SerialBT.begin("ESP32");
  Serial.println("The device started, now you can pair it with bluetooth!");
}

void loop() {
  unsigned long currentMillis = millis();
  // Send temperature readings
  if (currentMillis - previousMillis >= interval){
    previousMillis = currentMillis;
    sensors.requestTemperatures();
    temperatureString = String(sensors.getTempCByIndex(0)) + "C  " +  String(sensors.getTempFByIndex(0)) + "F";
    SerialBT.println(temperatureString);
  }
  // Read received messages (LED control command)
  if (SerialBT.available()){
    char incomingChar = SerialBT.read();
    if (incomingChar != '\n'){
      message += String(incomingChar);
    }
    else{
      message = "";
    }
    Serial.write(incomingChar);
  }
  // Check received message and control output accordingly
  if (message =="led_on"){
    digitalWrite(ledPin, HIGH);
  }
  else if (message =="led_off"){
    digitalWrite(ledPin, LOW);
  }
  delay(20);
}
拆开看核心逻辑。LED 挂 GPIO25,DS18B20 挂 GPIO32 走 OneWire。接收端把蓝牙读到的字符一个个拼进 message 字符串,遇到换行符就清空重来,这样指令匹配不会被上一次的残留字符污染。拼好的完整串拿去比对:等于 led_on 就拉高 GPIO25,等于 led_off 就拉低。发送端用 millis() 计时,每满 10 秒调一次 sensors.requestTemperatures(),把摄氏和华氏拼成一个字符串用 SerialBT.println() 推给手机。
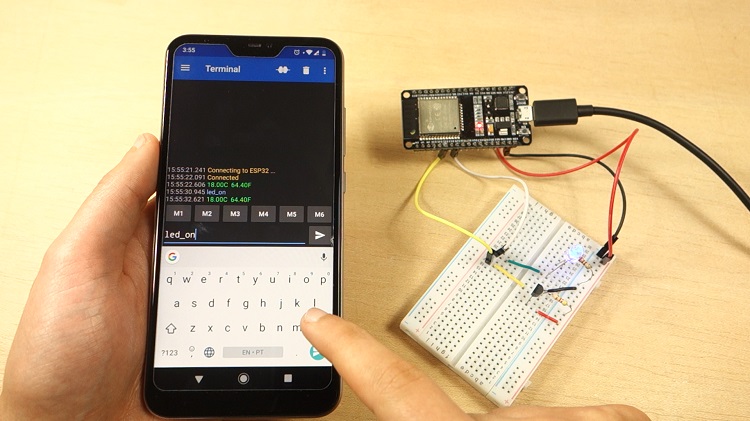
烧录后同样先配对连接。App 里发 led_on,LED 亮;发 led_off,灭。同时 App 每 10 秒会收到一条形如 25.37C 77.67F 的温度推送,串口监视器里能看到完整收发记录。
两个小提醒:一是把 DS18B20 换成别的传感器只需要改读取那几行,蓝牙推送框架不用动;二是指令匹配是精确比对,App 端别多发多余字符,也可以自己加 startswith 之类的宽松匹配。另外,代码里的头文件在这套发布系统里要写成引号形式,Arduino 工具链下尖括号和引号两种写法对库搜索路径等价,编译结果不受影响。
经典蓝牙和 BLE 到底怎么选
底稿作者的原话是:现阶段用经典蓝牙比 BLE 简单太多了。确实如此——SPP 就是老 HC-06 那套串口模型,Serial.begin 换成 SerialBT.begin 就完事,Android 端终端 App 一抓一大把。BLE 虽然省电、iOS 也支持,但要写 service/characteristic 那一套 GATT 概念,入门心智负担高一个量级。
选型口径:手机和 ESP32 之间要稳定双向串口数据流、且只考虑 Android 设备,直接上经典蓝牙;要低功耗长续航、或者必须兼容 iOS,再去啃 BLE。
把这套框架玩熟之后,可扩展的方向很多:把 LED 换成继电器就是蓝牙遥控开关,把温度换成超声波测距就是无线读数终端,甚至可以做成手机发指令给小车底盘。SerialBT 的接口跟 Serial 完全同构,所有你熟悉的串口玩法都能原样搬过来,这正是 ESP32 经典蓝牙最好 hack 的地方。




提示一下新手,烧录前板子和 COM 口要选对,不然串口监视器一直没输出,还有波特率记得 115200
每10秒推温度这个好用,我把 DS18B20 换成 DHT11 改了几行就读湿度了,推送框架完全不用动
串口蓝牙这块确实香,我拿 HC-06 时代那套思路直接平移过来,SerialBT.begin 一行就跑通了,配对完 App 里发啥串口就出啥
装了 Serial Bluetooth Terminal 试了下,led_on led_off 遥控没问题,就是消息末尾别带多余空格,字符串精确比对很容易踩
跟 BLE 比真的省心,GATT 那套 service characteristic 写过一次就再也不想碰了,手机端能连 Android 的终端 App 也多