
给机器人加个灯效状态栏,或者给桌面小装置做个氛围灯,WS2812B 大概率是绕不开的方案:一颗 LED 里集成了控制 IC,串联多少颗都行,主控只掏一根 GPIO 就能把每一颗的颜色单独安排明白。这次把它接到 ESP32 上,用 FastLED 库点亮一根 8 灯珠的灯条,从接线到四种灯效一次讲完。
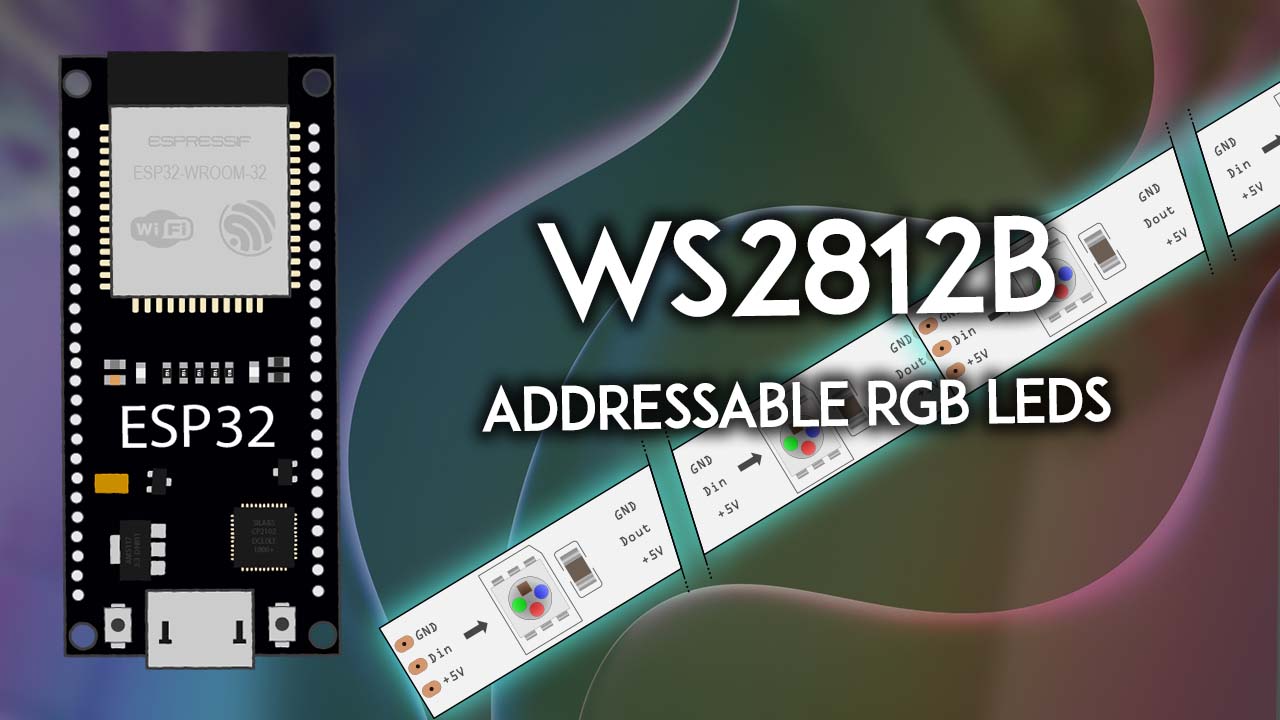
先认识 WS2812B:为什么只用一根线
普通 RGB LED 要占红绿蓝三路 PWM,灯珠一多线就没法看了。WS2812B 的思路不一样,它把控制芯片直接封装进灯珠,每颗 PCB 上留了 DIN(数据进)和 DOUT(数据出)两个引脚,前一颗的 DOUT 接后一颗的 DIN,整条灯就串起来了,主控只需一根数据线按序发地址化的颜色数据。
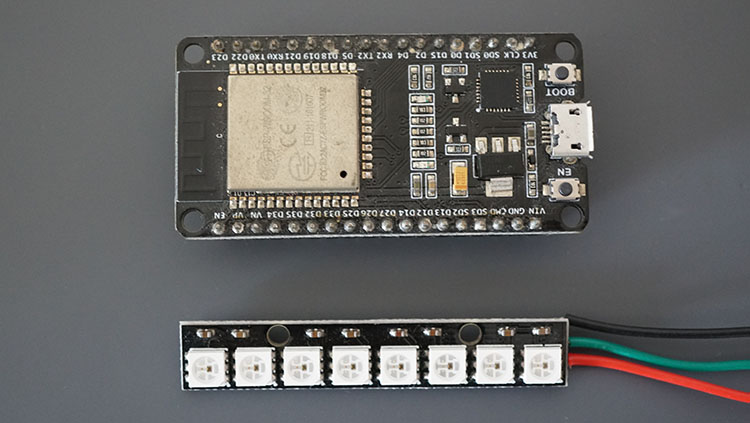
供电方面,WS2812B 是 5V 器件,满亮度下一颗约吃 50mA,30 颗一起全白理论上能拉到 1.5A。所以大跨度灯条建议外接 5V 2A 的电源适配器;本篇只用 8 颗的短灯条,直接从 ESP32 的 VIN 引脚取电就够。要提醒一句:如果用了外部电源,外部电源的 GND 必须和 ESP32 的 GND 连通,否则数据线上没有共同参考地,灯会闪成雪崩。
接线:三根线搞定
接线只需要三处连接:
- 灯条 GND → ESP32 GND
- 灯条 DIN → ESP32 GPIO 2(其实任意合适 GPIO 都行,代码里对应改宏即可)
- 灯条 5V/VDC → ESP32 VIN(5V)
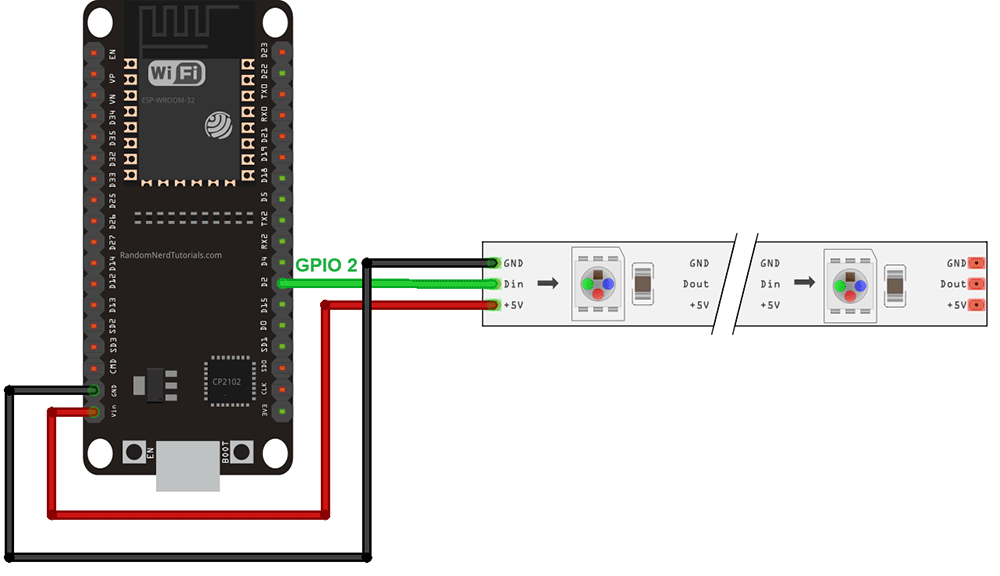
接线段多说一句:DIN 的方向别接反,数据要从灯条的输入端进。如果灯珠只在接电时白亮一下、之后怎么都不响应,八成是数据线接到了 DOUT 端,或者 GND 没共地。
装 FastLED 库
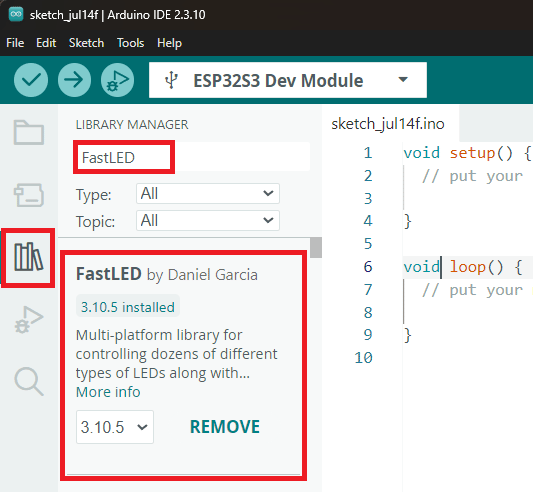
驱动 WS2812B 的库有好几个,本篇用 FastLED:打开 Arduino IDE 的库管理器(Library Manager),搜 FastLED,装 Daniel Garcia 维护的那个即可。截图时装到的是 3.10.5 版本,更新版本一般也兼容。
示例一:逐颗指定颜色
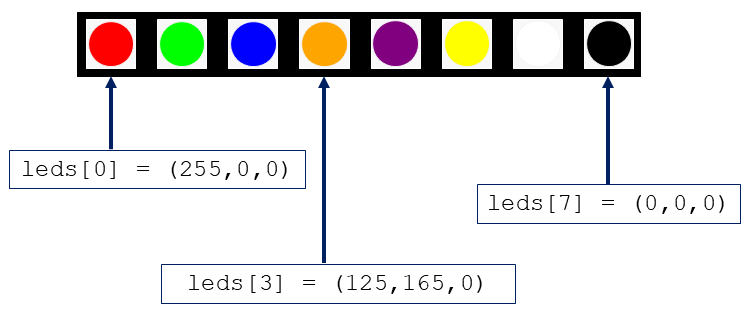
先从最基础的来——把 8 颗灯珠每颗设成不同颜色。把下面代码整段烧进 ESP32:
/*
  Rui Santos & Sara Santos - Random Nerd Tutorials
  Complete project details at https://RandomNerdTutorials.com/esp32-ws2812b-neopixels-arduino/
  Permission is hereby granted, free of charge, to any person obtaining a copy of this software and associated documentation files.
  The above copyright notice and this permission notice shall be included in all copies or substantial portions of the Software.
*/
#include "FastLED.h"

#define NUM_LEDS     8
#define DIN_PIN      2
#define BRIGHTNESS   80   // Brightness (0-255)
#define DELAY_MS     500

CRGB leds[NUM_LEDS];

void setup() {
  FastLED.addLeds(leds, NUM_LEDS);
  FastLED.setBrightness(BRIGHTNESS);
  FastLED.clear();
}

void loop() {
  leds[0] = CRGB(255, 0, 0);     // Red » (R=255, G=0, B=0)
  FastLED.show();
  delay(DELAY_MS);

  leds[1] = CRGB(0, 255, 0);     // Green » (R=0, G=255, B=0)
  FastLED.show();
  delay(DELAY_MS);

  leds[2] = CRGB(0, 0, 255);     // Blue » (R=0, G=0, B=255)
  FastLED.show();
  delay(DELAY_MS);

  leds[3] = CRGB(255, 165, 0);   // Orange » (R=255, G=165, B=0)
  FastLED.show();
  delay(DELAY_MS);

  leds[4] = CRGB(128, 0, 128);   // Purple » (R=128, G=0, B=128)
  FastLED.show();
  delay(DELAY_MS);

  leds[5] = CRGB(255, 255, 0);   // Yellow » (R=255, G=255, B=0)
  FastLED.show();
  delay(DELAY_MS);

  leds[6] = CRGB(255, 255, 255); // White » (R=255, G=255, B=255)
  FastLED.show();
  delay(DELAY_MS);

  leds[7] = CRGB(0, 0, 0);       // Off/Black » (R=0, G=0, B=0)
  FastLED.show();
  delay(DELAY_MS);

  FastLED.clear();
  delay(DELAY_MS);
}
关键点在 setup 里这行:FastLED.addLeds(leds, NUM_LEDS)。模板参数依次是芯片型号、数据引脚和颜色顺序。注意大部分 WS2812B 实际是 GRB 顺序而不是 RGB,写错了你会看到"要红却发绿"的灵异现象。灯条可以当成数组用, leds[0] 到 leds[7] 各自赋一个 CRGB 颜色,最后调 FastLED.show() 才真正把数据刷出去——改了数组不调 show,灯是不理你的。
示例二:整条同色填充
想整条灯一起变色,用 fill_solid() 一行搞定,不用自己写循环:
/*
  Rui Santos & Sara Santos - Random Nerd Tutorials
  Complete project details at https://RandomNerdTutorials.com/esp32-ws2812b-neopixels-arduino/
  Permission is hereby granted, free of charge, to any person obtaining a copy of this software and associated documentation files.
  The above copyright notice and this permission notice shall be included in all copies or substantial portions of the Software.
*/
#include "FastLED.h"

#define NUM_LEDS     8
#define DIN_PIN      2
#define BRIGHTNESS   80   // Brightness (0-255)
#define DELAY_MS     500

CRGB leds[NUM_LEDS];

void setup() {
  FastLED.addLeds(leds, NUM_LEDS);
  FastLED.setBrightness(BRIGHTNESS);
  FastLED.clear();
}

void loop() {
  fill_solid(leds, NUM_LEDS, CRGB(255, 0, 0));     // Color » Red
  FastLED.show();
  delay(DELAY_MS);

  fill_solid(leds, NUM_LEDS, CRGB(0, 255, 0));     // Color » Green
  FastLED.show();
  delay(DELAY_MS);

  fill_solid(leds, NUM_LEDS, CRGB(0, 0, 255));     // Color » Blue
  FastLED.show();
  delay(DELAY_MS);

  fill_solid(leds, NUM_LEDS, CRGB(255, 255, 255)); // Color » White
  FastLED.show();
  delay(DELAY_MS);
}
这个示例顺带是个提醒:全白 + 高亮度是电流大头。8 颗还扛得住,几十颗的灯条写全白满亮之前,先掂量一下电源。
示例三:来回追逐
经典的跑马灯,一颗亮灯来回扫,正反各一轮:
/*
  Rui Santos & Sara Santos - Random Nerd Tutorials
  Complete project details at https://RandomNerdTutorials.com/esp32-ws2812b-neopixels-arduino/
  Permission is hereby granted, free of charge, to any person obtaining a copy of this software and associated documentation files.
  The above copyright notice and this permission notice shall be included in all copies or substantial portions of the Software.
*/
#include "FastLED.h"

#define NUM_LEDS     8
#define DIN_PIN      2
#define BRIGHTNESS   80   // Brightness (0-255)
#define DELAY_MS     50   // Chase effect speed

CRGB leds[NUM_LEDS];

void setup() {
  FastLED.addLeds(leds, NUM_LEDS);
  FastLED.setBrightness(BRIGHTNESS);
  FastLED.clear();
}

void loop() {
  // Chase effect from left to right
  for (int i = 0; i < NUM_LEDS; i++) {
    FastLED.clear();            // Clear LEDs
    leds[i] = CRGB(0, 0, 255);  // Light current position
    FastLED.show();
    delay(DELAY_MS);            // Chase effect speed
  }
  // Reverse the chase effect direction
  for (int i = NUM_LEDS - 1; i >= 0; i--) {
    FastLED.clear();
    leds[i] = CRGB(0, 0, 255);
    FastLED.show();
    delay(DELAY_MS);
  }
}
改 DELAY_MS 就能调追逐速度,把颜色宏换成 CRGB(255, 0, 0) 就成了红色扫光。做机器人状态指示时这个模式很实用:正常时慢速绿扫,报错时快速红扫。
示例四:彩虹流动
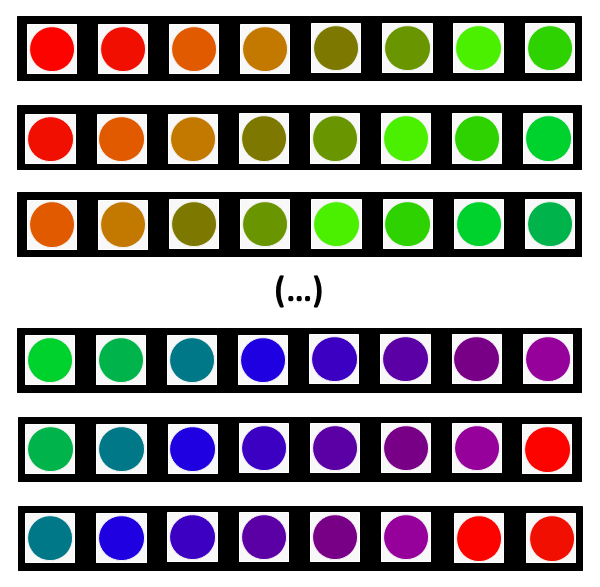
最好看的一个。用 HSV 颜色模型,色相(Hue)随位置和时间偏移,整条灯就是一道流动的彩虹:
/*
  Rui Santos & Sara Santos - Random Nerd Tutorials
  Complete project details at https://RandomNerdTutorials.com/esp32-ws2812b-neopixels-arduino/
  Permission is hereby granted, free of charge, to any person obtaining a copy of this software and associated documentation files.
  The above copyright notice and this permission notice shall be included in all copies or substantial portions of the Software.
*/
#include "FastLED.h"

#define NUM_LEDS     8
#define DIN_PIN      2
#define SATURATION   255   // Saturarion (0-255)
#define BRIGHTNESS   255   // Brightness (0-255)
#define DELAY_MS     20

CRGB leds[NUM_LEDS];

void setup() {
  FastLED.addLeds(leds, NUM_LEDS);
  FastLED.setBrightness(BRIGHTNESS);
  FastLED.clear();
}

void loop() {
  for (int i = 0; i < NUM_LEDS; i++) {
    // Set LED i to a moving rainbow color effect: i*10 creates color spread across LEDs
    // millis()/20 makes the rainbow slowly animate over time with full saturation and full brightness
    leds[i] = CHSV(i * 10 + millis() / 20, SATURATION, BRIGHTNESS);
  }
  FastLED.show();
  delay(DELAY_MS);
}
CHSV() 按 HSV 生成颜色:i * 10 让相邻灯珠色相错开,形成沿灯条铺开的色带;millis() / 20 是时间偏移,让整条色带随时间流动。注意这个示例把亮度和饱和度都拉满到 255,8 颗还在 VIN 的承受范围内,长灯条别照抄。
踩坑清单与扩展方向
最后把常见坑收个尾:
- 颜色对不上号,先查 GRB 顺序写没写对;
- 灯全不亮,按"DIN 方向 → 共地 → 5V 是否到位"顺序排查;
- 长灯条末端变暗或颜色发白,通常是供电压降,粗一点的供电线或两端馈电能解决;
- 灯条闪烁乱跳,优先怀疑杜邦线太长导致数据信号质量差,数据线尽量短。
这套单线驱动 + FastLED 的组合,往上是给灯条配网页控制端、把灯效接进机器人状态机,或者用 WS2812B 灯环做舵机角度可视化——底子都是本篇这几段代码。手头有 ESP32 和一根灯条的,可以直接开干。

照着这篇把桌上吃灰的8灯珠条子接上了,GPIO2一根线就成。之前一直被颜色顺序坑,要红出绿,原来GRB这茬,看了原理那段才反应过来,白折腾一晚上。
全白满亮的电流提醒很实在,我30颗的条子接开发板USB口直接重启,后来换的独立5V电源才稳。
彩虹那段millis()/20的写法比delay套循环优雅多了,学到了
数据线别太长这条深有体会,杜邦线超过半米就开始乱闪,换了根短的立好